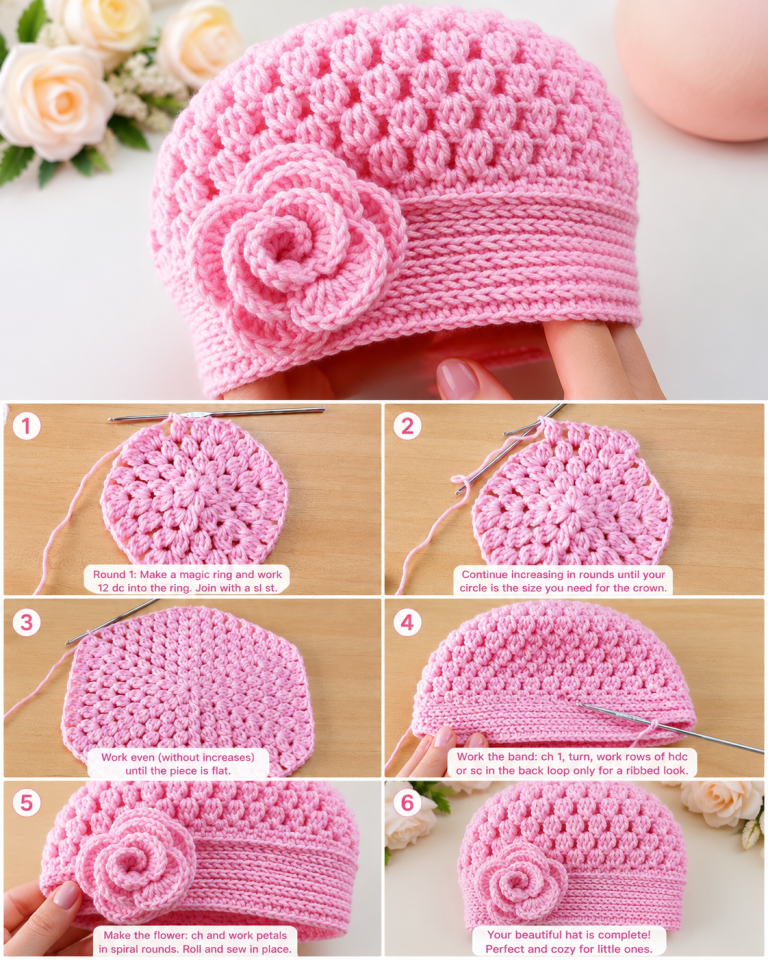
Crochet Cupcake Hat Pattern
Spring is the season when creativity blooms alongside nature, and there’s no better way to capture that spirit than with the Spring Flower Square crochet 3D pattern. This beautiful and textured square brings the freshness of spring flowers into your crochet projects, adding dimension and vibrancy that flat motifs simply can’t achieve. Whether you’re an experienced crocheter or a beginner looking for a challenge, this pattern offers a perfect balance of creativity and structure.
In this article, we’ll explore everything you need to know about making your own Spring Flower Square crochet 3D motifs. From fabric cuts and measurements to detailed step-by-step instructions, you’ll find a complete guide that’s easy to follow. By the end, you’ll be ready to crochet stunning squares perfect for blankets, cushions, table runners, and so much more.
Using Spring Flower Square crochet 3D as the focus, we’ll also discuss how to combine these squares creatively and give your finished project that unique, handmade feel that everyone loves. Let’s bring the garden indoors with yarn and hook!

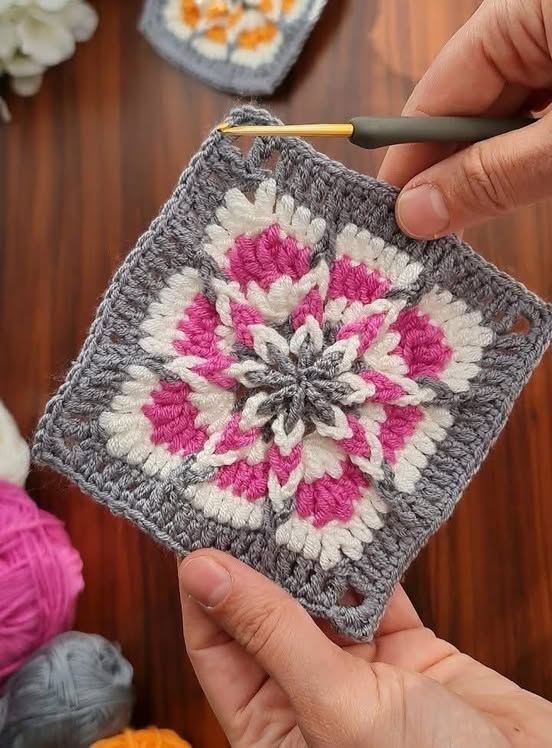
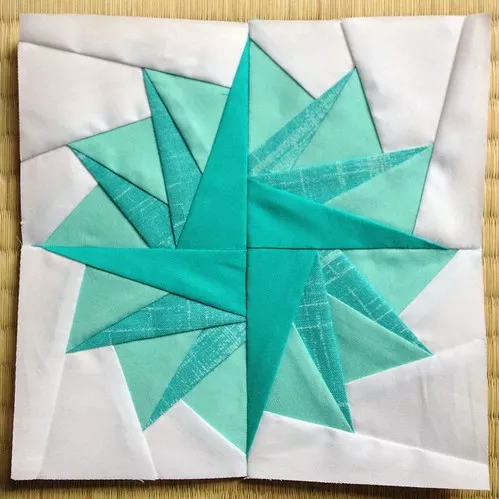
The Spring Flower Square crochet 3D pattern is a layered motif where petals appear to stand out from the background, creating a dynamic, lifelike effect. Unlike traditional flat granny squares, this design uses special stitch techniques to give the flower texture and depth.
This 3D effect is achieved by working petals in front post stitches and layering multiple rounds. The result is a blooming flower in the center of each square, giving your crochet work a stunning and tactile appearance. If you’ve been crocheting for a while but want to elevate your skills, this project is a great way to learn new techniques.
Choosing yarns is part of the fun. Soft cotton yarn in pastel shades or bright spring colors brings the flower to life. Use contrasting colors for petals and the square’s border to make each layer pop. Stick with medium-weight (worsted or DK) yarns to keep the shape defined.
Hooks matter too! A 4.0 mm (G) crochet hook generally works best for this pattern, but always check your tension and adjust if your petals look too tight or too loose. Consistency is key for creating squares that join seamlessly.
And don’t forget about finishing. Blocking your Spring Flower Square crochet 3D motifs is essential to make them look even and professional. Steam blocking gently helps the petals open and keeps the square flat at the edges.
Finally, think beyond the square! Use your Spring Flower Square crochet 3D motifs in creative ways: join them into baby blankets, use them on pillow covers, or even as decorative appliqués on bags or garments.
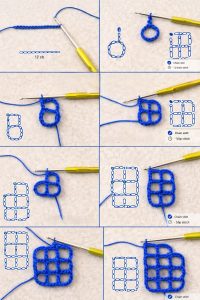
Now, let’s dive into the practical part: crocheting your Spring Flower Square crochet 3D motif. Gather your supplies first:
At this stage, you’ll see the center circle, and the base for your petals will begin to form.
The flower now has two rows of petals, giving it a beautifully layered 3D look.
Repeat this process to make as many Spring Flower Square crochet 3D motifs as your project requires.
While crochet doesn’t use “fabric cuts” like sewing, if you’re planning to join your Spring Flower Square crochet 3D motifs into a quilt-inspired project, here’s how to calculate and plan your layout.
Each finished square typically measures about 5 inches by 5 inches (12.7 cm x 12.7 cm) with medium-weight yarn and a 4.0 mm hook. Adjust your yarn or hook to resize.
If adding fabric sashing or borders:
Joining:
Beyond blankets and pillows, your Spring Flower Square crochet 3D motifs can become unique, personalized gifts and home decor.
With creativity, each Spring Flower Square crochet 3D motif becomes more than just a square—it becomes part of your handmade story.
The Spring Flower Square crochet 3D pattern brings texture, color, and dimension to any crochet project. Its layered petals and vibrant center make every square feel like a blooming flower, perfect for celebrating the beauty of spring.
From the step-by-step guide to planning your fabric cuts and creative uses, you now have everything you need to get started. Remember: experiment with colors, yarn types, and hook sizes to make your project truly yours.
Now it’s your turn! Have you tried making a Spring Flower Square crochet 3D motif before? Share your experience or your favorite color combinations in the comments. Happy crocheting!