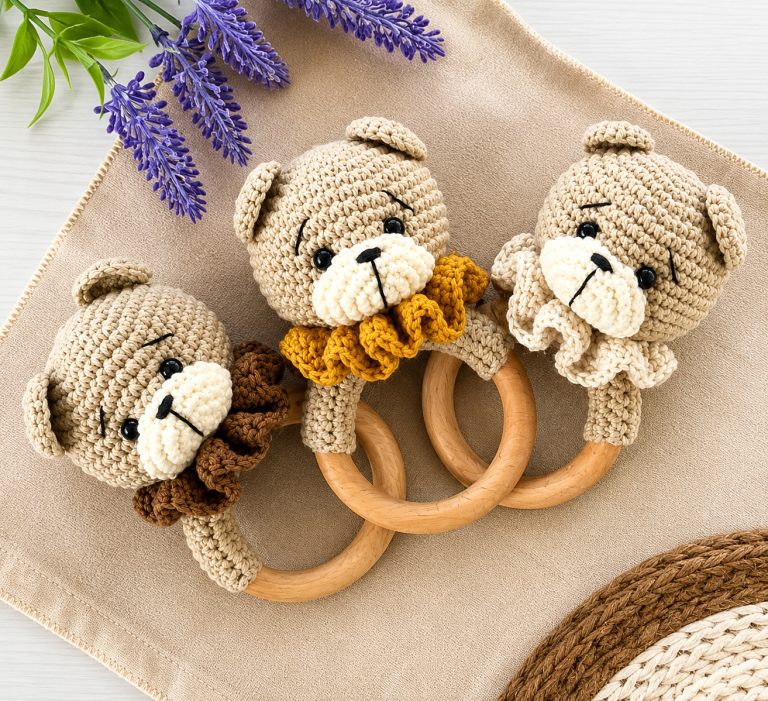
Crochet Bear Rattle Pattern

The Crochet Bear Rattle Pattern is a delightful handmade project that combines the timeless charm of crochet with the practicality of a safe baby toy. Whether you are creating a thoughtful baby shower gift, preparing handmade nursery accessories, or simply enjoying the relaxing process of crocheting adorable amigurumi.
This project offers a wonderful opportunity to create something both beautiful and meaningful. The soft teddy bear paired with a smooth wooden ring creates a classic baby rattle that is attractive, comfortable to hold, and enjoyable for little hands.
One of the greatest advantages of making a Crochet Bear Rattle Pattern yourself is the ability to customize every detail. You can select natural cotton yarns, choose colors that match a nursery theme, and safely embroider facial features instead of using plastic safety eyes for newborn-friendly versions. Handmade crochet rattles often become treasured keepsakes because they carry both sentimental value and the love invested in every stitch.
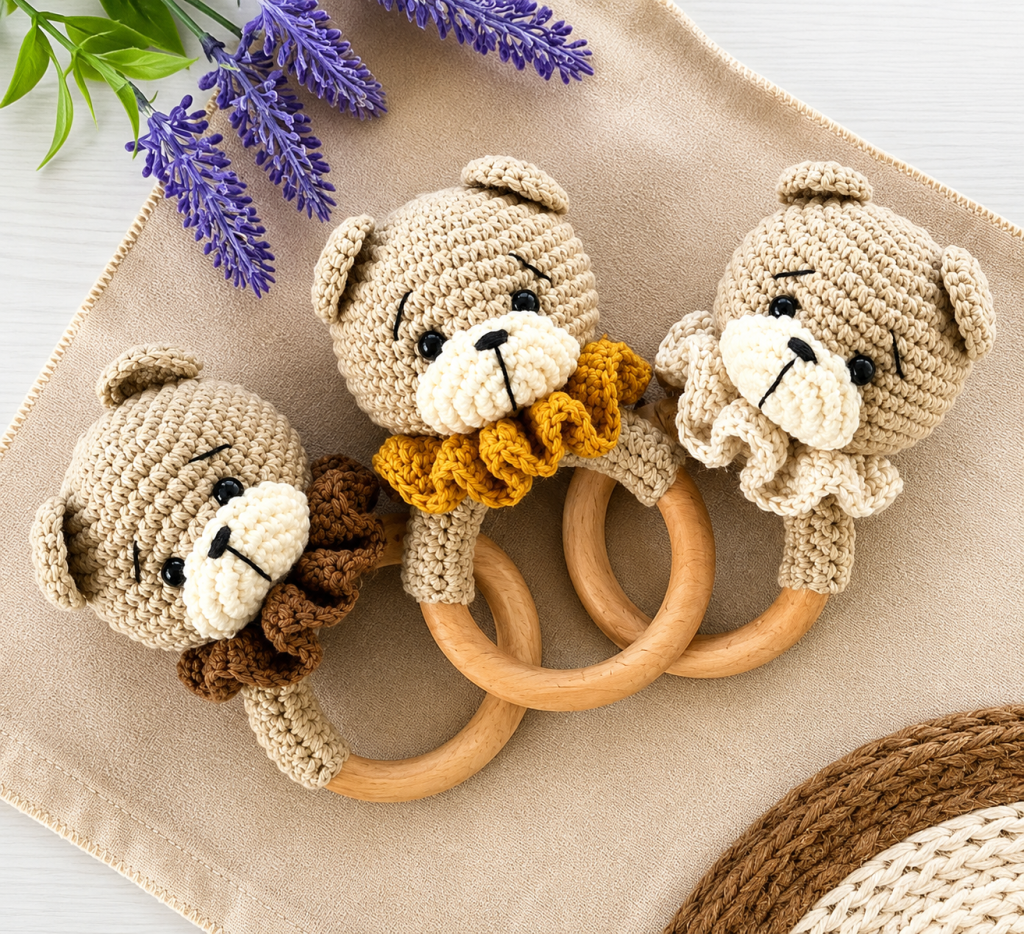
If you are comfortable with basic crochet stitches, this project is suitable for confident beginners as well as experienced crocheters. Throughout this guide, you will learn how to crochet the bear’s head, ears, muzzle, arms, and neck while using standard US crochet abbreviations. By following each step carefully, you will create a professional-looking Crochet Bear Rattle Pattern that is durable, attractive, and perfect for gifting.
Before starting your Crochet Bear Rattle Pattern, gather all your materials so the process flows smoothly from beginning to end.
Recommended materials include:
US Crochet Abbreviations:
Always use a stitch marker at the beginning of each round to keep your stitch count accurate.
Choosing cotton yarn is highly recommended because it provides excellent stitch definition, is durable, and can withstand frequent washing. Cotton is also less likely to pill compared to acrylic yarn.
When selecting a wooden ring, make sure it is unfinished, untreated, smooth, and specifically designed for baby toys.
For newborns, embroider the facial details instead of using plastic safety eyes to maximize safety.
Using invisible decreases instead of standard decreases creates a smoother finish and helps maintain the round shape of the bear’s head.
Finally, stuff each piece firmly enough to maintain its shape without stretching the stitches excessively.
Begin by crocheting the bear’s head.
Round 1:
MR, 6 sc. (6)
Round 2:
Inc in each stitch. (12)
Round 3:
(sc, inc) around. (18)
Round 4:
(2 sc, inc) around. (24)
Round 5:
(3 sc, inc) around. (30)
Round 6:
(4 sc, inc) around. (36)
Rounds 7–13:
36 sc evenly.
If using a rattle insert, place it inside the head before stuffing.
Stuff the head gradually while maintaining its round shape.
Round 14:
(4 sc, dec) around. (30)
Round 15:
(3 sc, dec) around. (24)
Round 16:
(2 sc, dec) around. (18)
Continue stuffing firmly before closing.
Round 17:
(sc, dec) around. (12)
Round 18:
Dec around. (6)
Fasten off and weave in the end.
The finished head should feel firm but slightly squeezable, making it pleasant for babies to hold.
The muzzle gives your Crochet Bear Rattle Pattern its adorable expression.
Muzzle:
Round 1:
MR, 6 sc.
Round 2:
Inc around. (12)
Round 3:
(sc, inc) around. (18)
Rounds 4–5:
18 sc.
Fasten off with a long sewing tail.
Stuff only lightly before sewing.
Embroider the nose using black embroidery floss with several satin stitches.
Add a simple vertical line beneath the nose.
Create a gentle smile using small embroidery stitches.
For each ear:
Round 1:
MR, 6 sc.
Round 2:
Inc around. (12)
Round 3:
12 sc.
Flatten the ear without stuffing.
Leave a long tail for sewing.
Attach both ears symmetrically between rounds 4 and 7.
Arms:
Round 1:
MR, 6 sc.
Round 2:
6 sc.
Round 3:
(sc, inc) around. (9)
Rounds 4–10:
9 sc.
Stuff lightly.
Flatten and sew closed.
Position the arms evenly around the wooden ring before attaching securely.
Ensure every stitch is tight so no loose parts remain.
The neck connects the head securely to the wooden ring.
Insert the hook through the top edge of the arm tube wrapped around the wooden ring.
Work evenly around with 18–20 sc depending on your gauge.
Continue for several rounds to build a sturdy neck section.
Stuff lightly before sewing the head securely onto the neck.
Use strong sewing yarn or double strands of cotton yarn for the final assembly.
Sew through multiple stitches several times to reinforce the connection.
Check every seam carefully before giving the toy to a child.
Gently tug on the ears, arms, muzzle, and head to ensure everything is firmly attached.
If desired, crochet a decorative ruffled collar using:
Round 1:
Join yarn around the neck.
(2 dc, ch 1, 2 dc) in every other stitch.
This creates a delicate decorative frill similar to classic vintage teddy rattles.
You can personalize your Crochet Bear Rattle Pattern by changing yarn colors. Soft beige, cream, caramel, chocolate brown, dusty pink, sage green, powder blue, or ivory all create beautiful results.
Small embroidered blush cheeks using pink thread add extra personality without compromising safety.
Always inspect the finished rattle regularly if it will be used by an infant. Wash gently by hand with mild soap, reshape while damp, and allow it to air dry completely before use.
Can beginners make this Crochet Bear Rattle Pattern?
Yes. If you already know how to make a magic ring, single crochet, increase, and invisible decrease, you can successfully complete this project by working slowly and counting your stitches.
Which yarn is best?
Mercerized or organic cotton yarn is highly recommended because it is durable, washable, and provides excellent stitch definition.
Can I use acrylic yarn?
Yes, but cotton is generally preferred for baby toys because it is sturdier and less likely to stretch over time.
Are safety eyes recommended?
For toys intended for newborns or young babies, embroidered facial features are the safest option.
What size hook should I use?
A 2.5 mm hook usually creates a tight fabric that prevents stuffing from showing through, although your ideal hook size may vary depending on your yarn.
Can I add a rattle insert?
Absolutely. A small baby-safe rattle insert can be placed inside the head before stuffing to create the classic rattling sound.
How should I clean the finished toy?
Hand wash using mild detergent, gently squeeze out excess water without twisting, reshape the bear, and allow it to air dry completely.
Can I customize the colors?
Of course. Neutral shades, pastel colors, or seasonal combinations all work beautifully and allow you to create a unique handmade gift.
Video Tutorial:
The Crochet Bear Rattle Pattern is a rewarding project that combines creativity, craftsmanship, and practicality into a charming handmade keepsake. Throughout this guide, you learned how to choose suitable materials, understand the essential US crochet abbreviations, crochet each individual component step by step, assemble the bear securely, and finish the rattle with professional details. With careful stitching, proper stuffing, and reinforced assembly, you can create a beautiful baby rattle that is both attractive and durable.
Every completed Crochet Bear Rattle Pattern reflects the care and dedication of the maker, making it a heartfelt gift for babies, new parents, or anyone who appreciates handmade crochet creations. As you gain confidence, don’t hesitate to experiment with different yarn colors, embroidered expressions, or decorative collars to make each bear truly one of a kind.
If you enjoyed this tutorial, please leave your honest opinion in the comments and share your suggestions. Your feedback and creative ideas help inspire future crochet projects and encourage fellow makers in the crochet community.