Lady of the Lake Quilt Block Pattern

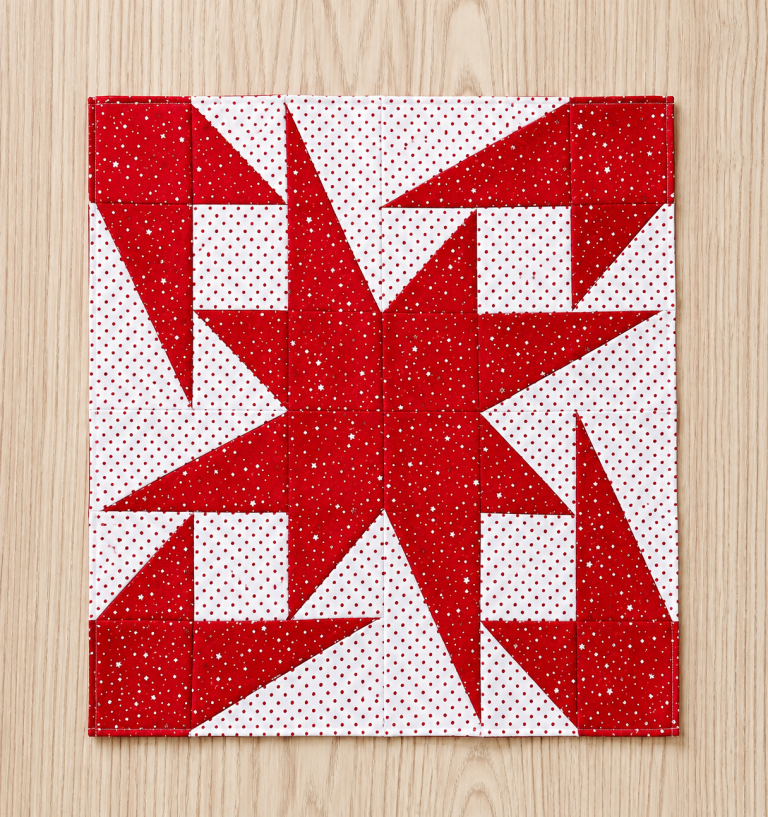
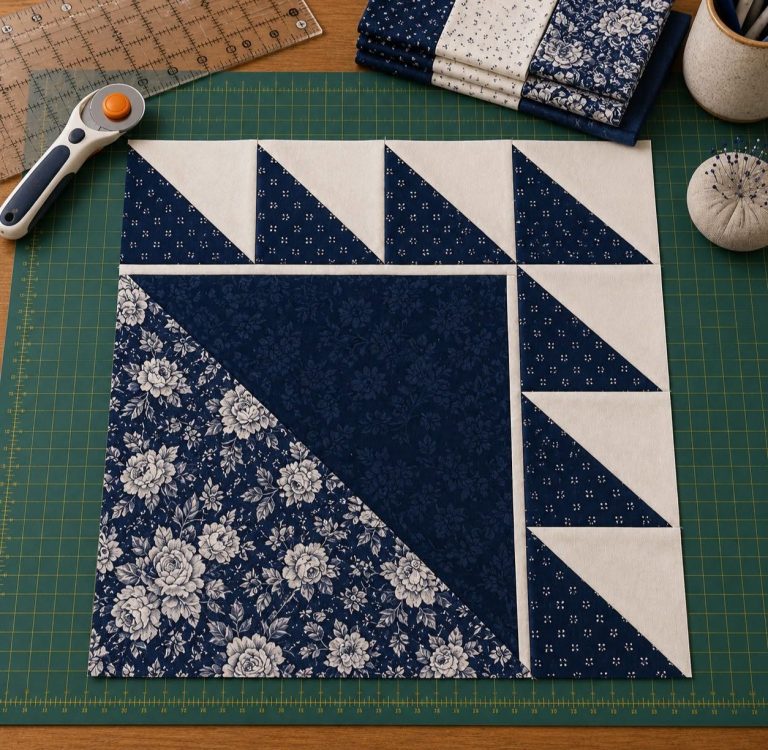
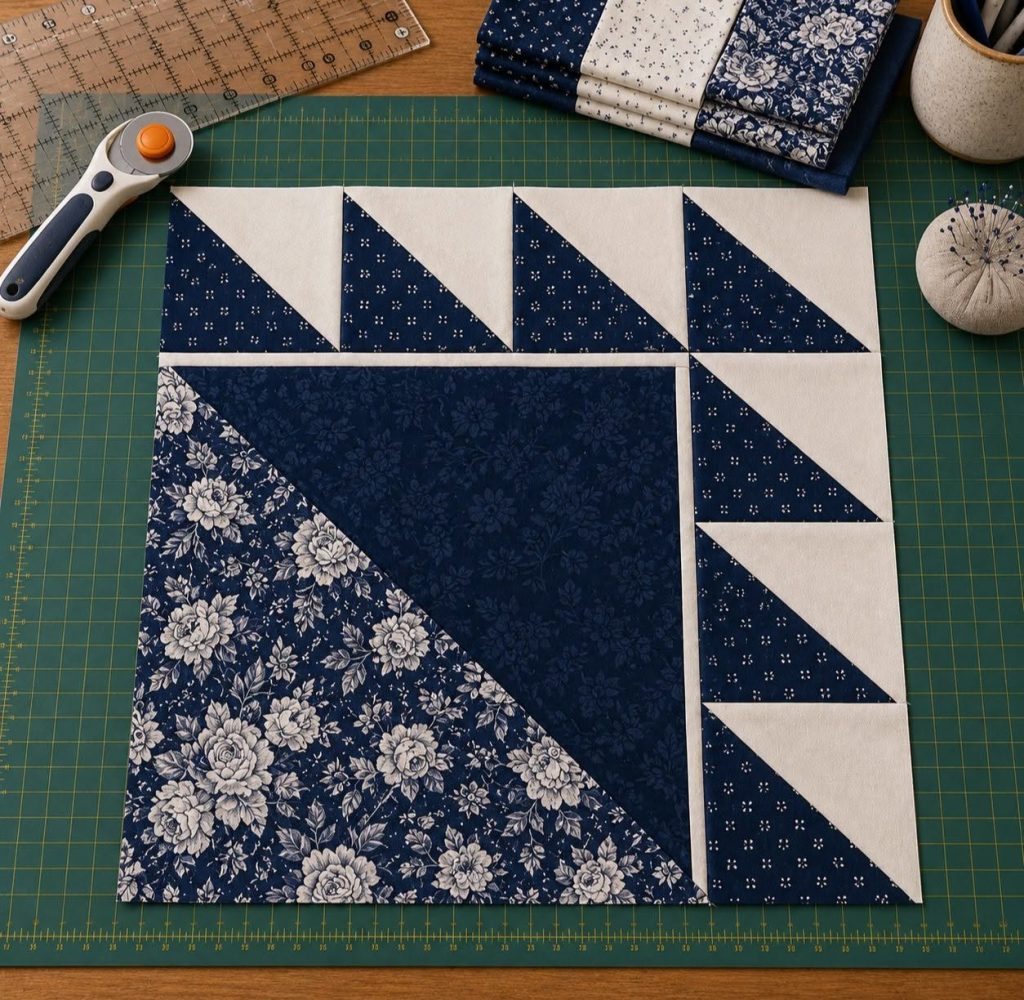
Lady of the Lake Quilt Block Pattern is a beautiful traditional quilting design that combines a bold diagonal focal area with a rhythmic arrangement of smaller half-square triangles (HSTs). The block shown in the reference photo has a particularly elegant appearance because it uses several coordinated navy fabrics against a soft cream background.
A large floral print creates visual movement in the lower-left section, while the dark tone-on-tone fabric balances it on the opposite side. Around the upper and right edges, smaller triangle units form a distinctive geometric border. This combination makes the design look detailed without requiring unusually complicated piecing techniques. For quilters who enjoy classic blocks, coordinated fabric collections, and precise geometric sewing, this project provides an excellent opportunity to practice several essential quilting skills.
The key to successfully recreating the Lady of the Lake Quilt Block Pattern is understanding its construction before cutting the fabric. Looking closely at the photographed project, the main section is dominated by two large triangular areas that meet along a diagonal line. One side features the floral navy print, while the other uses a darker navy floral texture. Smaller navy-and-cream half-square triangle units continue along the top and right sides, producing the recognizable frame-like effect. Rather than trying to sew the entire block at once, it is much easier to think of the project as several independent units. You prepare the large diagonal section, make a collection of matching HST units, arrange everything carefully, and then join the sections using an accurate 1/4-inch seam allowance.
One advantage of this quilt block is how easily its personality can change through fabric selection. High contrast is especially helpful because it allows the triangle geometry to remain visible from a distance. Navy and cream create the sophisticated result seen in the photograph, but red and white, green and ivory, black and gray, or even carefully coordinated scraps can work beautifully. The Lady of the Lake Quilt Block Pattern can therefore become part of a traditional quilt, a modern two-color quilt, a table topper, a wall hanging, or a decorative pillow. Throughout this tutorial, the focus will be on accurate cutting, consistent seams, careful pressing, and logical assembly so that even a quilter who has not made this block before can understand how the photographed design comes together.
Start by selecting three visually compatible fabrics plus a contrasting background. To reproduce the character of the photo, choose a large-scale navy floral fabric for the prominent lower-left triangle, a dark navy tone-on-tone print for the upper-right portion of the large center, and a smaller navy print for the repeated HST units. Use cream, ivory, or warm white for the contrasting triangles. Keeping the blues related while varying their prints creates depth without making the block look overly busy.
For equipment, prepare quilting cotton, a rotary cutter, self-healing cutting mat, acrylic quilting ruler, sewing machine, neutral cotton thread, iron, ironing surface, and fine pins or quilting clips. A square quilting ruler is particularly useful because every HST can be checked and trimmed before assembly. Precision at this stage has a noticeable effect on the finished block.
The exact cutting dimensions can be adapted according to the finished block size you want. A practical approach is to determine the finished size of each small HST first and build the block proportionally around that unit. For example, if your design uses small HSTs that finish at 3 inches, prepare their starting squares slightly oversized so that they can be trimmed accurately after stitching. This method is often more forgiving than trying to sew every triangle at its exact finished measurement immediately.
For the large central diagonal section, prepare two large squares or oversized triangular pieces from the feature fabrics. One will provide the floral portion and the other the darker navy portion. When these pieces are joined diagonally, they should form a large square or rectangular-square section comparable to the prominent area visible in the photograph. Remember that all cut pieces require seam allowance beyond their final visible dimensions.
Before making any permanent seams, arrange the fabrics on your work surface. Position the large floral triangle toward the lower left and the darker triangle toward the upper right. Next, place the smaller HST units provisionally along the top and right edges. This quick quilt block layout confirms that the prints, values, and triangle directions work together before sewing begins.
Press all fabric before cutting, but avoid stretching it with the iron. Quilting accuracy depends heavily on straight grain and square pieces. Hold the ruler securely while cutting and make clean passes with the rotary cutter. If a piece is slightly distorted now, that small discrepancy can multiply as several units are joined together. Careful preparation is one of the simplest ways to improve the finished Lady of the Lake Quilt Block Pattern.
The repeated half-square triangle, commonly abbreviated as HST, is the most important small unit in this project. An HST is a square made from two triangular fabrics divided diagonally from corner to corner. In the photographed block, each small unit combines navy fabric with cream fabric. When multiple HSTs are placed in sequence, their diagonal lines create the striking geometric border.
An efficient way to make HSTs is the two-at-a-time method. Cut one cream square and one navy square of identical dimensions. Place them right sides together, carefully aligning all four edges. On the wrong side of the lighter square, draw a diagonal guideline from one corner to the opposite corner using a removable fabric marker or fine pencil.
Sew a straight seam 1/4 inch on each side of the drawn diagonal line. Do not stitch directly over the marked center line. After both parallel seams are complete, cut directly along the marked diagonal. Opening the pieces will reveal two matching HST units. Repeat this process until you have enough triangles for the top and right sections of your chosen block configuration.
Press each unit carefully. First set the seam briefly with the iron, then open the triangle and press the seam according to your preferred quilting method. Pressing toward the darker fabric is convenient because the seam is less likely to show through the cream fabric. However, you can also press some seams in opposite directions when this helps adjacent seam allowances nest together during final assembly.
Now square up the HSTs. Place the ruler’s 45-degree line directly over the diagonal seam and trim the first two edges. Rotate the unit and trim the remaining edges to the required unfinished measurement. Do not skip this step. Even a difference of 1/16 or 1/8 inch can become noticeable when four or more units are sewn into a continuous row.
Orientation is just as important as size. In the photographed Lady of the Lake Quilt Block Pattern, the navy portions create a consistent directional rhythm. Lay all completed HSTs beside the central section before joining anything. Rotate each square until the diagonals follow the intended direction. Taking a quick reference photo of your layout before sewing can also help prevent accidentally rotating a unit while carrying pieces to the sewing machine.
The large center gives this version of the Lady of the Lake Quilt Block Pattern its strongest visual impact. To recreate the photograph, use a statement floral fabric for the lower-left triangle and a darker, quieter fabric for the upper-right triangle. This pairing allows one side to attract attention while the other provides visual rest. Place the two large pieces right sides together and align the diagonal seam carefully.
Sew the large diagonal seam with a consistent 1/4-inch quilting seam. Because diagonal edges contain bias grain, handle them gently. Pulling or stretching these edges can distort the center section and prevent it from lying flat. Once stitched, press the seam carefully rather than aggressively sliding the iron across it. Square the completed center section before proceeding.
Next, construct the upper HST row. Following the reference layout, arrange the small navy-and-cream HSTs side by side with their diagonal orientation consistent. Sew neighboring units together one pair at a time. After every seam, check that the triangle points remain aligned and that the units have not accidentally rotated. Continue until the strip matches the required width of the section beneath it.
Construct the vertical right-hand HST strip in the same manner. In the reference image, this strip extends downward beside the large diagonal center and continues the visual rhythm established across the top. Join the individual units carefully, checking their orientation after every addition. Press the connecting seams so the strip remains straight rather than developing a curve.
Now assemble the major components. Depending on how you have divided your block, you can first attach the upper HST row to its neighboring section and then sew the right HST column beside the center. Pinning at important intersections helps prevent shifting. Start by matching the ends, then match the central points and seams before adding additional pins between them. This distributes fabric evenly along the seam.
Once the block is assembled, place it on a cutting mat and examine its overall geometry before trimming. Check the diagonal line, HST points, outside edges, and corners. If necessary, make only minimal adjustments. Avoid trimming aggressively simply to force the block to a measurement, because doing so may remove triangle points. A carefully assembled Lady of the Lake quilt block should look balanced, lie reasonably flat, and preserve approximately 1/4 inch beyond important points for future seams.
Final pressing can transform a correctly sewn block into a polished-looking one. Place the finished block wrong side up and gently press the seam allowances into comfortable positions. Turn it right side up and press again without stretching the fabric. A pressing motion, where the iron is lifted and repositioned, is generally safer than pushing it repeatedly across bias-heavy patchwork.
One common problem is losing the points of the half-square triangles. This usually happens because the HSTs were trimmed too small or because the final joining seam crosses the diagonal point incorrectly. Ideally, the tip of a triangle should sit about 1/4 inch inside the unfinished edge before another section is attached. That small margin allows the point to remain visible after the seam is sewn.
Another potential issue is a block that refuses to lie flat. First check whether the large diagonal center was stretched during construction. Then inspect the HST strips. Small inconsistencies in seam allowance can gradually make a strip longer or shorter than the section beside it. Accurate quarter-inch seams, properly squared HSTs, and gentle pressing prevent most of these problems.
For a traditional interpretation, stay with two strongly contrasting colors. A blue-and-white Lady of the Lake Quilt Block Pattern has a timeless appearance, especially when different blue prints are mixed as shown in the photograph. Scrappy versions are equally appealing: use several fabrics within one color family for the dark triangles while keeping a consistent neutral background to unify the block.
You can also create a more modern version by replacing floral prints with solids. Imagine charcoal with white, deep green with pale beige, or burgundy with soft cream. The absence of printed motifs puts greater emphasis on the block’s diagonal geometry. Alternatively, use the large central triangle as an opportunity to feature a favorite large-scale print while keeping the surrounding fabrics understated.
After completing several blocks, experiment with rotating them before joining them into a quilt top. Repeated Lady of the Lake quilt blocks can generate secondary diagonal patterns that are not obvious when looking at one block alone. Before sewing a complete quilt, place the blocks on a design wall, floor, or large table and try different rotations. This is one of the most enjoyable stages because the same individual block can create dramatically different overall quilt layouts.
What is a Lady of the Lake Quilt Block Pattern?
The Lady of the Lake Quilt Block Pattern is a traditional patchwork design strongly associated with contrasting triangular geometry. Different historical and modern interpretations may vary in proportions and fabric placement, but half-square triangles are a defining visual feature. The version inspired by the reference photo combines a prominent large diagonal section with smaller HST units arranged along adjoining edges.
Is this quilt block suitable for beginners?
Yes, particularly for a confident beginner who already knows how to sew a straight seam. The construction itself is not exceptionally complicated. The main challenge is precision. Beginners should concentrate on mastering half-square triangles, maintaining a consistent 1/4-inch seam allowance, and squaring each unit before assembly.
What does HST mean in quilting?
HST means half-square triangle. It is a square patchwork unit containing two fabric triangles separated by a diagonal seam. HSTs are among the most widely used building blocks in patchwork quilting because rotating them can create stars, diamonds, zigzags, pinwheels, and many other designs.
Why should HST units be made slightly oversized?
Making them slightly oversized gives you room to trim them after sewing and pressing. Diagonal seams can occasionally distort fabric, particularly because part of the cut edge follows the bias grain. Squaring oversized units produces more consistent results and makes the final block easier to assemble accurately.
What fabrics work best for this project?
Standard quilting cotton is an excellent choice because it cuts cleanly, presses well, and is easy to piece. For maximum visual definition, choose fabrics with noticeable value contrast. The photographed combination of cream, navy micro-print, navy floral, and dark tone-on-tone fabric demonstrates how several prints can work together while maintaining a cohesive color palette.
Can I make the block in different sizes?
Absolutely. The pattern can be scaled as long as all components are resized proportionally and appropriate seam allowances are retained. Instead of focusing only on one fixed measurement, think about the relationship between the large central section and the smaller HSTs. Planning the HST finished size first can make scaling much easier.
How can I get sharper triangle points?
Start with accurately squared HSTs and maintain a reliable 1/4-inch seam allowance. When joining units, look for the point where diagonal seams intersect and position the next seam carefully so it does not cut too deeply into the point. Pinning important intersections also reduces movement while sewing.
Should seams be pressed open or to one side?
Both methods can work. Pressing toward the darker fabric is traditional and often convenient. Pressing seams open can reduce bulk where several pieces meet. For rows of HSTs, alternating seam directions may allow neighboring seams to nest together, which can improve alignment.
Can scraps be used for a Lady of the Lake quilt?
Yes. A scrappy version can be very attractive. Keep the background relatively consistent and use scraps of similar value for the darker triangles. This preserves the recognizable geometry while allowing many fabrics to appear throughout the quilt.
How do I prevent the block from becoming distorted?
Avoid pulling diagonal fabric edges, square up each HST, sew with consistent seam allowances, and press rather than drag the iron. It is also helpful to measure sections before joining them. Correcting one small unit is much easier than correcting an entire assembled block.
What can I make with a single finished block?
A single Lady of the Lake Quilt Block Pattern can become a pillow front, mini quilt, wall hanging, table mat, tote bag panel, or decorative centerpiece. Multiple blocks can be repeated to create lap quilts, throws, bed quilts, or larger patchwork projects.
The Lady of the Lake Quilt Block Pattern combines traditional patchwork character with a strong geometric layout that looks impressive in both classic and contemporary fabrics. By dividing the project into manageable stages, the construction becomes much easier to understand: select contrasting fabrics, prepare the large diagonal center, create accurate half-square triangles, square every unit, arrange the top and side sections, and finally join everything with consistent 1/4-inch seams.
The navy-and-cream example demonstrates how thoughtful fabric placement can give a traditional quilt block additional depth. The large floral triangle becomes the focal point, the subtle dark print balances it, and the smaller HSTs create movement around the design. The same construction principles can be adapted to entirely different color palettes, making this a versatile block worth practicing.
Most importantly, give yourself time to check the layout before every major seam. Quilting precision comes from many small, careful decisions rather than rushing toward the finished block. Once you become comfortable making and positioning the HST units, repeating the design for a larger quilt becomes much faster and more intuitive.
If you make your own Lady of the Lake Quilt Block Pattern, leave your sincere opinion about the project and share any suggestions you have. It would also be wonderful to know which fabric colors, prints, or layout variations you would choose for your own version.