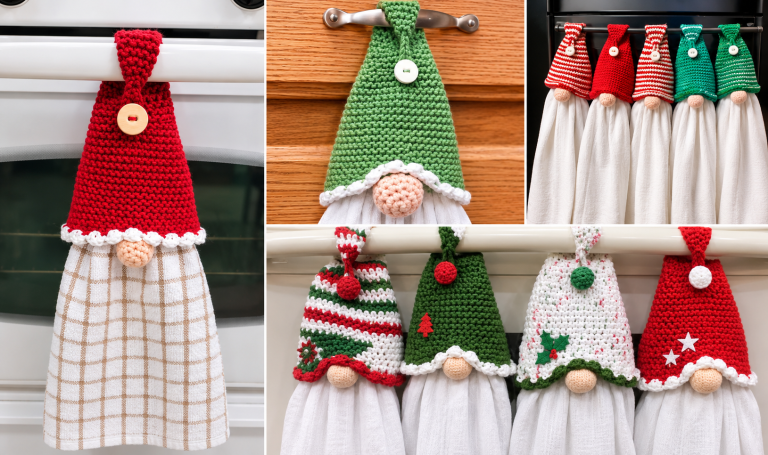
Crochet Gnome Towel Topper Pattern

The Crochet Baby High Top Sneakers Pattern is one of the most charming and rewarding projects for crochet enthusiasts who enjoy creating handmade baby accessories. Inspired by the timeless look of classic high-top sneakers, this adorable pattern combines comfort, style, and creativity into a beautiful crochet project that makes a thoughtful baby shower gift or a treasured keepsake.
Whether you are making them for your own little one or for someone special, these crochet sneakers are sure to become a favorite. By following this detailed tutorial, you will learn how to build the shoes step by step using US crochet terminology, making the process enjoyable even if you already have experience with basic crochet stitches.
Crocheting baby shoes offers much more than simply creating a cute accessory. It allows you to personalize every detail, from the yarn colors to the finishing touches, while practicing essential crochet techniques that can later be applied to many other projects. This Crochet Baby High Top Sneakers (Converse-Style) Pattern focuses on creating a realistic sneaker appearance while ensuring the finished shoes remain soft, flexible, and comfortable for delicate baby feet. Throughout this guide, you will discover how each section of the shoe is constructed, how to shape the sole correctly, and how to add the signature sneaker details that make this project so recognizable.
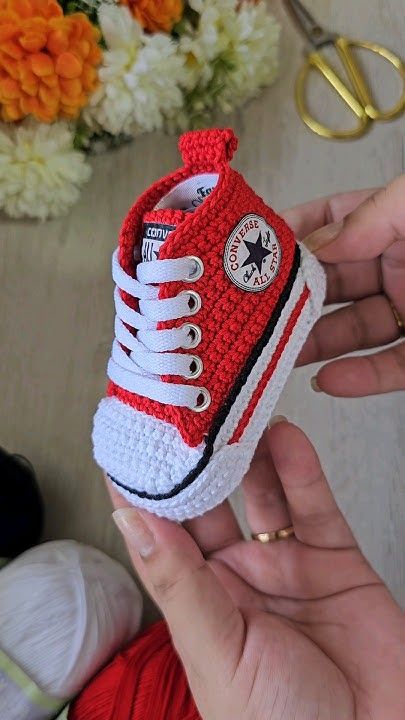
Before starting, gather your materials and read through the entire pattern once. Understanding the construction sequence makes crocheting much easier because each section builds naturally onto the previous one. The pattern uses common stitches found in most beginner-to-intermediate crochet projects, including ch (chain), sl st (slip stitch), sc (single crochet), hdc (half double crochet), dc (double crochet), inc (increase), dec (decrease), BLO (back loop only), FLO (front loop only), and st (stitch). By carefully following each step, maintaining consistent tension, and counting your stitches frequently, you’ll create a polished pair of Crochet Baby High Top Sneakers (Converse-Style) Pattern that look both professional and handmade with love.
Choosing quality materials is one of the most important steps in achieving beautiful results. Soft cotton or cotton-blend yarn is highly recommended because it provides excellent stitch definition while remaining gentle against a baby’s sensitive skin. Select one main color for the sneaker body, white yarn for the toe cap and sole, and a contrasting color if you’d like decorative stripes similar to classic sneakers.
Recommended materials include worsted weight (#4) cotton yarn, a 3.5 mm (E-4) crochet hook, tapestry needle, stitch markers, small scissors, measuring tape, and soft polyester stuffing if you wish to lightly reinforce the toe section. Flat shoelaces may be replaced with a long crochet chain if desired.
The approximate finished sole length for newborn size measures about 9 cm (3.5 inches). For babies between 3 and 6 months, increase the sole length to approximately 10 cm (4 inches) by adding extra stitches during the sole rounds. Always measure while crocheting rather than relying solely on stitch counts since yarn thickness varies among brands.
Here are the primary US crochet abbreviations used throughout this pattern:
ch = chain
sl st = slip stitch
sc = single crochet
hdc = half double crochet
dc = double crochet
inc = increase (2 stitches in the same stitch)
dec = decrease
BLO = back loop only
FLO = front loop only
st = stitch
Before beginning, crochet a small gauge swatch using sc stitches. Consistent gauge helps both shoes match perfectly. If your stitches appear too loose, choose a smaller hook. If they feel stiff or tight, increase your hook size slightly until the fabric feels soft yet structured.
Every successful pair of crochet sneakers starts with a well-shaped sole. This foundation determines the comfort, balance, and final appearance of the finished shoes. Take your time during this section, as accurate stitch placement makes the remaining construction much easier.
Round 1: Ch 11. Starting in the second chain from the hook, work 1 sc in each of the next 8 chains. Work 3 sc into the final chain. Continue working along the opposite side of the foundation chain. Crochet 1 sc in each remaining chain. Finish by placing 2 sc into the first chain. Join with sl st.
Round 2: Ch 1. Work inc into the first stitch. Crochet 1 sc into each stitch across the side. Increase evenly around both toe and heel curves by working 2 sc into each designated curve stitch. Continue with 1 sc along the opposite side. Join with sl st.
Round 3: Ch 1. Continue shaping by alternating sc and inc around each curved end while maintaining 1 sc along the straight sides. The sole should now appear symmetrical with a smooth oval shape. Count stitches carefully to ensure both soles remain identical.
Once the sole reaches the desired size, create the edge that separates the sole from the shoe upper. Crochet one complete round using BLO only. This technique naturally folds the fabric upward, producing the distinctive sneaker profile seen in classic high-top shoes.
Next, build the sidewalls by crocheting 1 sc into every stitch around for three complete rounds without increasing. These rounds should begin to stand vertically, forming the walls of the sneaker. Keep your tension even so the shoe maintains its shape while remaining flexible enough for a baby’s foot.
Finally, inspect both soles carefully before moving on. Compare stitch counts, dimensions, and overall symmetry. Correcting small differences now is much easier than after the upper portion has already been completed. With the sole finished, the foundation of your Crochet Baby High Top Sneakers (Converse-Style) Pattern is complete, and you’re ready to start building the recognizable sneaker body in the next section.
With the sole completed, it is time to transform the foundation into a recognizable sneaker. This stage shapes the body of the shoe, creating the comfortable fit that gently hugs the baby’s foot while giving the Crochet Baby High Top Sneakers (Converse-Style) Pattern its classic high-top appearance. Work slowly and check the symmetry after every few rounds to ensure both shoes remain identical.
Round 1 of the Upper: Attach the main color yarn at the center back of the sole. Ch 1 and work 1 sc into each stitch around. Join with sl st. This round establishes the lower edge of the sneaker body and should sit evenly around the entire sole without pulling or flaring.
Round 2: Ch 1. Continue with 1 sc in every stitch around. For a neat finish, keep your tension consistent and avoid tightening the stitches at the corners. The sidewalls should now stand firmly while remaining soft enough to allow flexibility when dressing the baby.
Round 3: Ch 1. Crochet 1 sc in each stitch around until you reach the front third of the shoe. Here, begin shaping the toe by working sc2tog (single crochet decrease) across the center front. Continue with 1 sc around the remaining stitches and join with sl st. This gentle decrease starts forming the rounded sneaker toe.
Repeat another shaping round using the same decrease placement. The front opening will gradually become narrower while maintaining a smooth curve. Avoid making too many decreases at once, as gradual shaping creates a much more realistic sneaker profile.
Now create the tongue opening. Crochet only across the side stitches, leaving the center front unworked. Turn your work at the end of each row instead of joining in the round. Continue for approximately 8 to 10 rows, depending on the desired height. This opening will later accommodate the crochet tongue and shoelaces.
Inspect both uppers before continuing. They should have matching heights, identical front openings, and smooth edges without curling. Small adjustments can still be made by adding or removing one row before proceeding.
The details are what transform a simple baby bootie into an elegant Crochet Baby High Top Sneakers (Converse-Style) Pattern. The tongue, eyelets, heel loop, decorative stripes, and crochet laces all contribute to the realistic appearance while maintaining the softness expected in handmade baby footwear.
To crochet the tongue, attach the main color yarn at the lower center of the opening. Ch 1 and work 1 sc across the front stitches. Turn your work and continue crocheting back and forth for approximately 10 to 12 rows. If you prefer a rounded tongue, decrease one stitch at each side during the final two rows.
Next, crochet the ankle extension. Starting at one side of the opening, work 1 sc evenly around the ankle edge until reaching the opposite side. Repeat for another two rounds. This creates the signature high-top collar while strengthening the opening.
To form the eyelets, crochet one round using the following sequence: sc in next 3 sts, ch 1, skip 1 st, then repeat across each side of the opening. On the following round, work 1 sc into every stitch and 1 sc around each chain space to reinforce the eyelets for the laces.
Create the heel pull tab by chaining 8. Slip stitch back into each chain, then attach both ends securely to the center back of the sneaker. Reinforce with several extra stitches to ensure durability. This small addition closely resembles the pull loop found on traditional high-top sneakers.
For the decorative side stripe, attach contrasting yarn around the sole edge and work one continuous round of sl st or surface crochet. Add a second stripe if desired to imitate the classic athletic shoe design. These simple details dramatically enhance the finished appearance without adding unnecessary bulk.
Finally, crochet the shoelaces by chaining approximately 80 to 100 chains, depending on the shoe size. Fasten off and weave each lace through the eyelets in a traditional crisscross pattern. Tie a small bow at the front, ensuring it is secure but not overly tight. Weave in every loose end carefully using a tapestry needle, inspect both shoes for symmetry, and gently steam-block if necessary to achieve a polished, professional finish.
After completing both sneakers, take a few moments to inspect every stitch and finishing detail. Make sure all yarn ends are securely woven into the inside of the shoes using a tapestry needle. This simple step not only improves the appearance of the finished project but also ensures there are no loose strands that could become tangled around a baby’s tiny toes. A neat finish is one of the characteristics that makes a handmade project look professional.
To achieve a perfectly balanced pair, compare both sneakers side by side. Check that the soles are the same length, the tongues are equal in height, and the ankle openings match. Even experienced crocheters find it helpful to make these comparisons before considering the project complete. Minor adjustments made at this stage can greatly improve the final result.
If you would like to create larger or smaller sizes, begin by adjusting the foundation chain used for the sole. Add or subtract chains in pairs while maintaining the same increase pattern around the toe and heel. As the sole becomes longer, simply add one or two additional rounds to the sidewalls and upper to preserve the shoe’s proportions. Always measure against the baby’s foot or a sizing chart rather than relying only on age recommendations.
Color customization is another enjoyable part of this Crochet Baby High Top Sneakers (Converse-Style) Pattern. While the classic combination of red, black, and white creates a timeless sneaker look, you can experiment with pastel shades for newborns, neutral colors for everyday wear, or vibrant tones for playful outfits. Coordinating the yarn colors with baby blankets, hats, or cardigans also creates beautiful handmade gift sets.
Proper care will help these crochet sneakers remain beautiful for years. Wash them gently by hand using cool or lukewarm water and a mild detergent designed for delicate fabrics. Avoid twisting or wringing the shoes, as this may distort their shape. Instead, gently press out excess water with a towel and reshape them while they dry flat. This preserves both the stitch definition and the comfortable fit.
Most importantly, enjoy the creative process. Every pair of Crochet Baby High Top Sneakers (Converse-Style) Pattern reflects the care, patience, and craftsmanship of the maker. Whether your first pair is perfect or not, each project builds confidence and improves your crochet skills for future creations.
Can beginners make this Crochet Baby High Top Sneakers (Converse-Style) Pattern?
Yes. Beginners who already know basic stitches such as chain, single crochet, half double crochet, slip stitch, and increases can successfully complete this project by working carefully and following the instructions step by step.
Which yarn works best for baby sneakers?
Soft cotton or cotton-blend yarn is highly recommended because it is breathable, durable, washable, and provides excellent stitch definition while remaining comfortable against delicate baby skin.
What crochet hook size should I use?
A 3.5 mm (E-4) hook works well with most worsted-weight cotton yarns. However, always check your gauge and adjust the hook size if necessary to achieve the correct measurements.
How can I make a larger size?
Increase the starting chain for the sole, continue the oval increases proportionally, and add extra rounds to the upper portion. Measuring the sole frequently is the most accurate way to achieve the desired size.
Can I replace the crochet laces?
Yes. You may use satin ribbon, soft cotton cord, or flat shoelaces designed for baby shoes. Whatever option you choose, ensure the laces are securely tied and always supervise babies while wearing accessories.
Can these sneakers be worn outdoors?
This pattern is intended primarily for indoor wear, photography sessions, baby showers, and special occasions. If outdoor use is desired, a non-slip fabric sole or leather sole can be added to improve durability and grip.
How do I keep both shoes identical?
Count your stitches after every round, use stitch markers, record any pattern adjustments, and complete the second shoe immediately after finishing the first while the construction details are still fresh in your mind.
Can I add decorative details?
Absolutely. Small crochet stars, embroidered initials, colorful stripes, bows, or contrasting heel tabs can personalize the sneakers while maintaining their classic high-top appearance. Just avoid using small detachable embellishments for very young babies.
Creating the Crochet Baby High Top Sneakers Pattern is a rewarding project that combines creativity, practical crochet techniques, and thoughtful handmade craftsmanship. Throughout this tutorial, you learned how to construct the sole, shape the upper, crochet the tongue, create the ankle section, form realistic eyelets, make crochet laces, and add finishing details that give these sneakers their recognizable Converse-style appearance. Each stage builds upon the previous one, allowing you to develop both confidence and skill while producing an adorable pair of baby shoes that can be treasured for years.
The beauty of the Crochet Baby High Top Sneakers (Converse-Style) Pattern lies in its versatility. By changing colors, adjusting sizes, and experimenting with small design details, you can create unique pairs suitable for newborn gifts, baby showers, birthdays, or everyday wear. Handmade crochet projects carry a personal touch that simply cannot be replicated by mass-produced items, making every finished pair truly special.
In this article, you learned how to choose appropriate materials, understand the essential US crochet abbreviations, crochet a properly shaped sole, build the sneaker upper, form the toe section, create the tongue, add the ankle collar, crochet realistic shoelaces, customize colors, adjust sizing, and care for the finished shoes so they remain beautiful over time. By practicing these techniques, you’ll also strengthen the crochet skills needed for many future footwear and baby accessory projects.
Thank you for reading this complete guide to the Crochet Baby High Top Sneakers (Converse-Style) Pattern. I sincerely hope this tutorial inspires you to create your own beautiful handmade baby sneakers with confidence. If you enjoyed this article, please leave your honest opinion in the comments and share any suggestions, tips, or creative ideas you’d like to see in future crochet tutorials. Your feedback helps inspire new patterns and supports the growing crochet community.